
 Did you know that you can create just “one” presentation and then present variations of that “one” presentation to different audiences by including, omitting or rearranging certain slides from that “one” presentation? Yes, you can!
The average PowerPoint user would have one master PowerPoint presentation file and then do a File > Save As (Keyboard shortcut: F12) for each of the other variations of the same presentation. No need to do this anymore! PowerPoint has a very cool feature a hidden secret that many people don’t know about. It’s called creating a “Custom Show”.
To Create a Custom Show
1. Open PowerPoint 2010 and your respective file.
2. On the Ribbon, go to the:
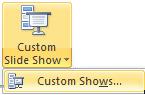
Slide Show (Tab) > Start Slide Show (Group) > Custom Slide Show (Button)

3. Click on the Custom Slide Show button.
4. Click on Custom Shows.
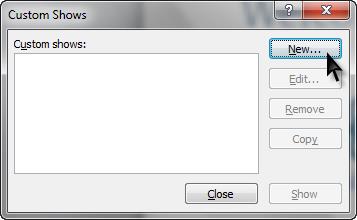
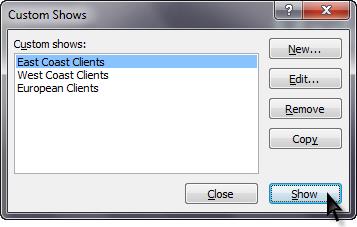
5. The Custom Shows dialog box will appear. Click on the New button.
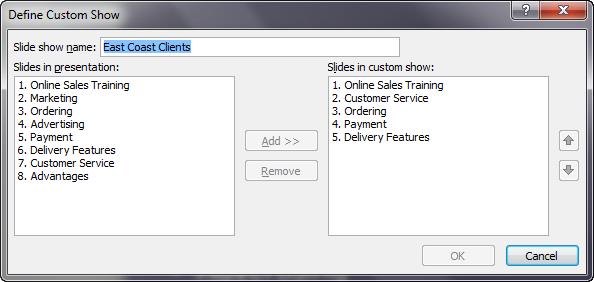
6. The Define Custom Show dialog box will appear. Type the Custom Show name you want where it reads: Slide show name: Custom Show 1
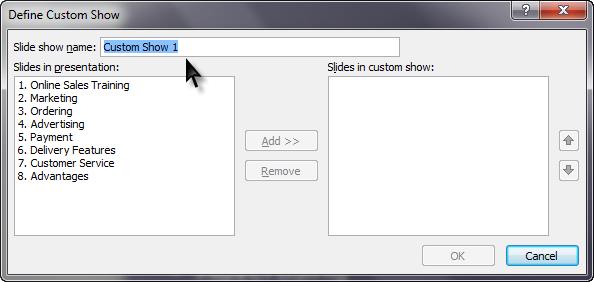
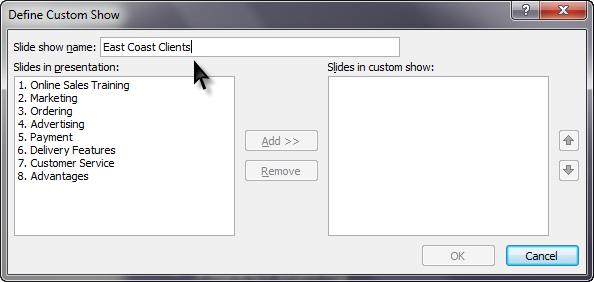
7. The first column represents all of the slides in the presentation. Select the slides from the first column that you would like to include in your Custom Show which is represented in the second column. To select the slides, double-click the slide name in the first column. The slide name will then appear in the second column.

Rearrange the Custom Show Slides
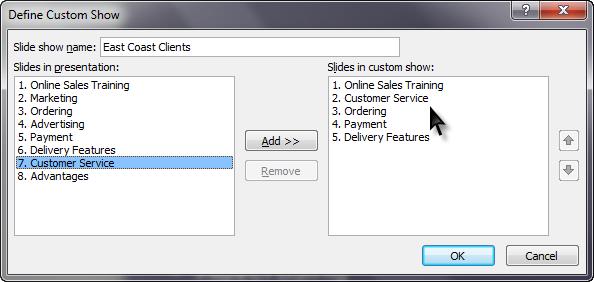
8. While in the Define Custom Show dialog box, you can rearrange the slides in the order of preference. Use the arrow buttons on the far right of the dialog box. For example, slide #5 which is the Customer Service slide was moved up to be slide #2 for this Custom Show.
9. Once all the slides are in the order you would like them to be, click the OK button.
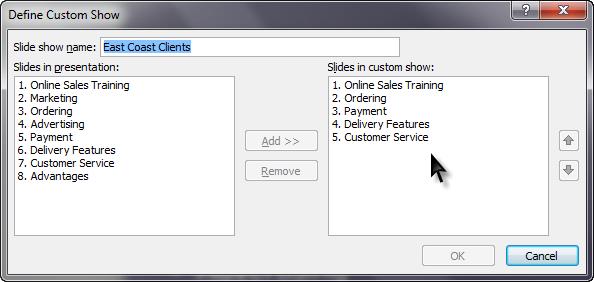
10. The Define Custom Show dialog box will appear.

To create various Custom Shows
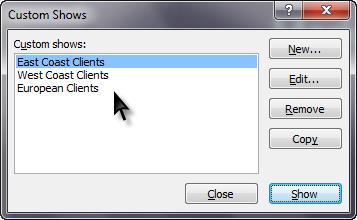
11. By clicking on the New button, you can create more Custom Shows.

To Edit Custom Shows
12. Click on the Edit button, if you need to make any changes to an existing Custom Show.
13. The Define Custom Show dialog box will appear. Make the necessary changes and click the OK button. If no changes, click the Cancel button.
To run the Custom Show
There are two ways to run your newly created Custom Show.
Method 1
1. From the Custom Shows dialog box, click on the Show button.
2. The presentation will be shown in Slide Show Presentation mode.
Method 2
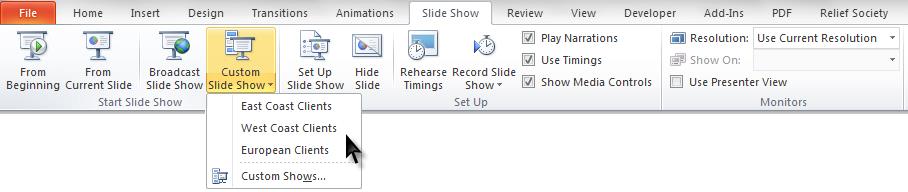
1. On the Ribbon, go to the:
Slide Show (Tab) > Start Slide Show (Group) > Custom Slide Show (Button)
2. Click on the Custom Slide Show button and you will see a list of your Custom Shows. Click on the Custom Show you wish to run as your Slide Show Presentation.
3. Congratulations! You have successfully created, edited and ran your Custom Show.
Question: Do you have several versions of the same presentation?
Challenge: Take some time to review those presentation files and see how you can streamline them so future presentation edits will not be so time consuming.
Click here to download this Snippet Blog Post
Want to learn more cool tips like these? Please send us an email to subscribe to our new monthly newsletter. We strive to share tips and tricks that will help you become more efficient and productive using the computer software tools you have available.
No comments yet.